 By Amy Allen
Need a means of boosting your food production in a tiny, indoors space? Why not set up a Kratky jar? This is a low-cost, low-maintenance, high-output means of food production that can help you to grow a wide number of foods in your kitchen. What does it entail? Let’s take a closer look…
What is a Kratky jar?
 The Kratky method of hydroponics was discovered by Bernard Kratky, Emeritus Horticulturalist at the University of Hawaii. It’s a passive method, requiring no pumps, fans, or anything fancy. Kratky jars can be made from just about anything, from a standard Mason jar to an old plastic creamer bottle. Some Kratky systems are very large and fancy, utilizing large totes or tanks. The only limit is your imagination and what’s in your possession.
This method is ideal for apartment & condo dwellers since it requires so little space or equipment. It’s also very adaptable and can be used to grow anything from greens & herbs to tomatoes, peppers, squashes, and cucumbers. (It’s not well suited to root crops, however, since the vegetables will tend to break the reservoir.)
This article will teach you the basic principles and setup of a Kratky passive hydroponics system. I’ll also include my experiences so far setting up my first Kratky system.
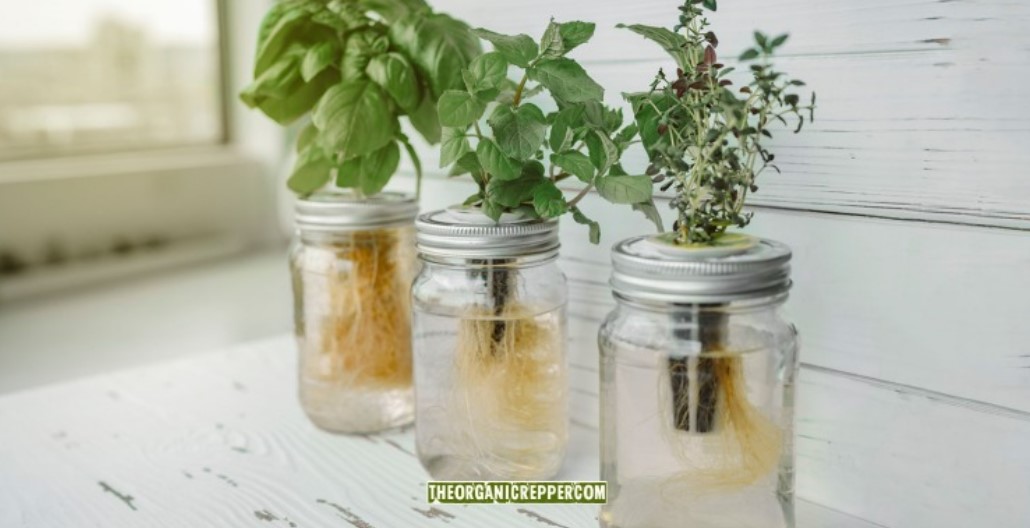
The basic setup is very simple.
The little plant is suspended in a net pot containing some kind of structural component, such as rock wool, coco coir, or peat moss. The reservoir is filled with nutrient-containing water, and there should be an air space in the jar. Most plants don’t like wet feet, and they need oxygen just as much as we do.
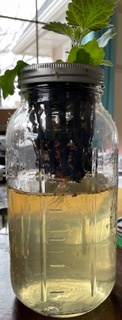
The plant roots will grow down into the solution as they feed, making the air space larger as the nutrient solution is used up.
What do you need to set up a Kratky jar?
The reservoir can be just about anything, as noted above.
There are a number of YouTube videos on the subject, including several from Kratky himself. I’ve seen everything from standard Mason jars to, I kid you not, leftover coffee creamer bottles being used.
The size of the reservoir will be a factor in what exactly can be grown in your Kratky jar. If you’re using a Mason jar or creamer bottle, you’ll want to grow smaller things like greens, herbs, and micro-tomatoes. If you’re using a large tote with holes cut into the top, you can grow full-size tomatoes, taro, cucumbers, eggplants, and even strawberries.
I’m growing micro-tomatoes in mine. I’ll likely expand as I learn more and become more comfortable with the method. Also, note that covering the jar, so light doesn’t grow algae in it isn’t a bad idea if you’re using a clear glass reservoir.
Net pots come in many sizes, and which size you’ll need depends on the size of your reservoir.
Wide-mouth Mason jars will require a 3” pot. I made my first Kratky jar in a 1/2 gallon Ball jar using a 4” pot, cut down to fit and held in place by the jar ring. I was determined to use only what I had on hand and buy nothing, so I had to adapt a bit. Whatever works, right? The net pot is necessary so the roots can grow freely into the solution. A standard plant pot won’t work for this purpose.
Grow media is very easy to acquire, or you can make your own.
As noted above, rock wool and coco coir are the most common media but far from the only choices. Rock wool can be expensive but can be reused, ditto coco coir. The media holds the plant upright. It gives no nutrients and serves no other purpose, so in theory, just about anything will do as long as it’s not toxic to the system.
Perlite or packing peanuts are even workable as long as they can be kept in the pot. Mesh or even pantyhose can hold the media as long as the roots can grow through it. Similar parameters apply to using kitchen sponges, though please note you don’t want the sponges with soap or other chemicals for this use.
As long as they’re not too heavy for the plant roots to grow through, it’s an option. I chose long-fiber sphagnum moss since it’s what I had on hand and stuffed it into my net pot, tight but not too tight. For more information on hydroponic grow media, check out this site HERE.
What kind of nutrient solution do you need?
Many standard hydroponics mixes contain NPK plus calcium, magnesium, and iron. Remember, however, that plants require ten essential nutrients, not six. While plants can be grown using the standard mix, they’ll grow better if a few more of the essentials are present, such as boron, manganese, copper, and zinc.
There are a number of excellent commercial mixes, such as Masterblend International, or you can very easily make your own using compost from your own pile in the form of compost tea. Simply add a shovel full or two to a five-gallon bucket of water, let it sit for three days, strain out the sediment, and use.
Suspend the plant in the reservoir such that the roots touch the nutrient solution. This is a very important point! The nutrients won’t do the plant any good if the roots aren’t absorbing nutrients, right?
(A Kratky jar is the perfect way to boost your food production and increase your disaster resiliency. Check out our free QUICKSTART Guide to building a 3-layer food storage plan to learn more.)
Another component is lighting.
Windows are fine as long as the light is strong enough. Grow lights are a great option, and combining the two is perfectly acceptable. I placed my Kratky jar by an East-facing window beneath a single T5 grow light, and my micro tomato seems to be quite happy there.
LCD panels are certainly an option as well. Note that this is the only part of the Kratky system that requires power. Other than this, Kratky is a completely passive system.
A pH meter is totally optional but a nice thing to have, nonetheless.
Most vegetable plants prefer a pH in the 6.5-6.8 range, and some plants, such as strawberries and blueberries, prefer an environment even more acidic. If you have a pH meter handy, you can better help to ensure that you are giving your little plants the optimum environment for maximum growth.
So that’s all there is to it!
All you need is a reservoir, a net pot, nutrients, and good lighting. There are no fans or pumps to worry about, so the power going out isn’t as deadly to this system as it is to others.
And that’s not the only benefit of passive hydroponics! For those with very short growing seasons, such as myself, this system can be used to provide fresh greens and other goodies through the winter, when those things are outrageously expensive to buy. Smaller reservoirs can turn unproductive tabletops into food-producing areas, and I believe that any item I can grow is one less thing I need to buy at the grocery store!
Hydroponics can add a layer to your food production system, and Kratky jars are the easiest way to get your feet wet if you’ve never worked with this particular method. A single jar can expand into totes worth of food, produced right in your own space.
This method is suitable for apartments and condos, where space is at a premium and yard gardening may not be an option. Keep the weight of a water-filled tote in mind before you put it on your lanai, however! Most lanai aren’t built to take a lot of weight. But within parameters, it’s very easy, so why not give it a try? You may be pleasantly surprised at what you can grow!
And while you’re at it, make a plan to use or preserve all of that fresh produce. The Seasonal Kitchen Companion contains not only fun trivia but the basics of canning, freezing, and dehydrating anything you can’t eat right away. Since city dwellers such as myself also buy from the farmer’s market and my CSA, preserving what I have for winter eating is a must!
Have you tried Kratky or other tabletop hydroponics? How has it worked for you? Do you have any tips or advice? Tell us in the comments!
Source: The Organic Prepper
Amy Allen is a professional bookworm and student of Life, the Universe, and Everything. She’s also a Master Gardener with a BS in biology, and has been growing food on her small urban lot since 2010.


